Stuffed Chicken Kiev
The Marriage of Ruth’s Chris Stuffed Chicken and Chicken Kiev Recipes
Behind every one of my recipes, there is a little story and I always tell the story if there is one to tell. About 20+ years ago, I went to dinner for the first time at Ruth’s Chris Steakhouse, and instead of ordering a steak, I ordered the stuffed chicken. It was so good and I was determined to figure out how to make it. I asked the waiter a few questions and if he could tell me the ingredients and he said it had cream cheese, butter, and herbs in the filling. I’m excited to share this yummy chicken Kiev recipe below.
Not long after that, I left for a trip to England to coach a boys soccer team and one night, my husband and I were able to take a break from all the kids and go on a date. We had been told that the pub up the street from Queen Victoria’s Royal Holloway where we were staying had really good food. We figured we’d give it a try. I ordered the chicken kiev and it was delicious. I had never heard of this before and it reminded me a little bit of the chicken I’d had at Ruth’s Chris.
When I returned home, I decided to marry the two recipes together and this has become one of our favorite recipes. Every year I host a Christmas party for my husband’s office and this is always one of the requests from my husband’s dental team. I love making this for them and many will be so happy that I’ve finally shared the recipe here. I hope you like it as much as we do!
Stuffed Chicken Kiev Recipe

Stuffed Chicken Kiev
Equipment
- 20-30 toothpicks
- stand mixer or hand mixer
- food processor optional
Ingredients
- 6 whole chicken breast
- 1 pkg. softened regular cream cheese
- ¼ cup softened butter (1 cube)
- 2 tbsp fresh chopped parsley
- 1/2 juice of one lemon or 2-3 tsp lemon juice
- 1 tsp garlic seasoning salt
- ½ cup melted butter (2 cubes)
- 4 cups crushed corn flakes
Instructions
- Pound 6 whole chicken breasts until flat and about 1/4 inch thick, set aside. I use a meat tenderizer/mallet and sometimes, if I can get the butcher to do it for me, I'll have them tenderize the chicken breasts. This saves time so ask your butcher if you want to try it that way.
- Preheat oven to 375°
- Put 4 cups crushed corn flakes in a ziplock bag and use a rolling pin to crush them up into fine pieces. You can also do this in a food processor if you have one. Place them in a medium to large shallow bowl or pie plate and set aside.
- Place the 1 pkg. softened regular cream cheese, one ¼ cup softened butter (1 cube), 2 tbsp fresh chopped parsley, 1/2 juice of one lemon or 2-3 tsp lemon juice, and 1 tsp garlic seasoning salt into a stand mixer and mix until everything is combined well and there are no lumps of cream cheese or butter. You can also do this in a medium-sized bowl with a hand mixer or do it by hand too. Set aside.
- Melt the remaining ½ cup melted butter (2 cubes) into a shallow bowl or pie plate.
- Spray a baking dish with non-stick cooking spray.
- Take all the ingredients and line them up for an assembly line (chicken, toothpicks, butter, then cornflakes) and have your toothpicks laid out.
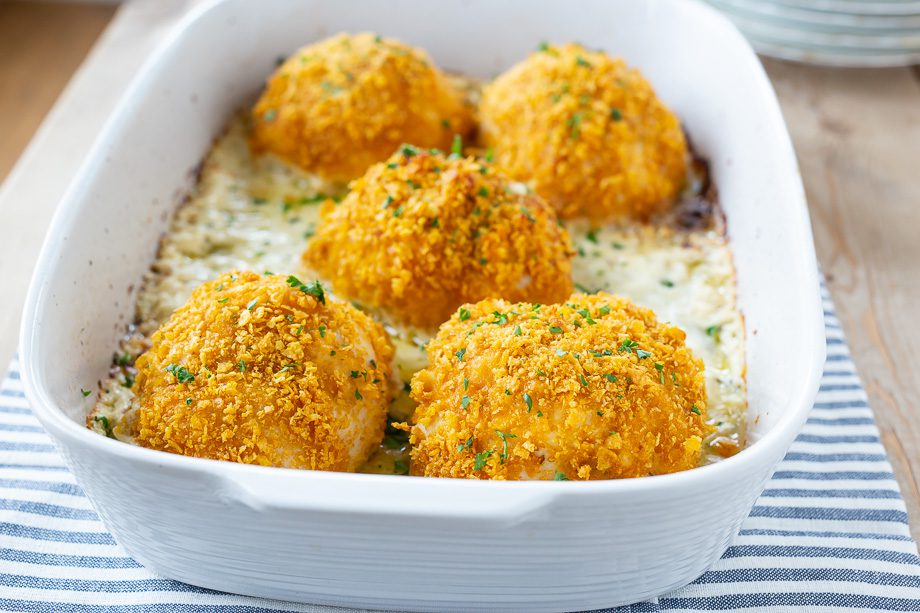
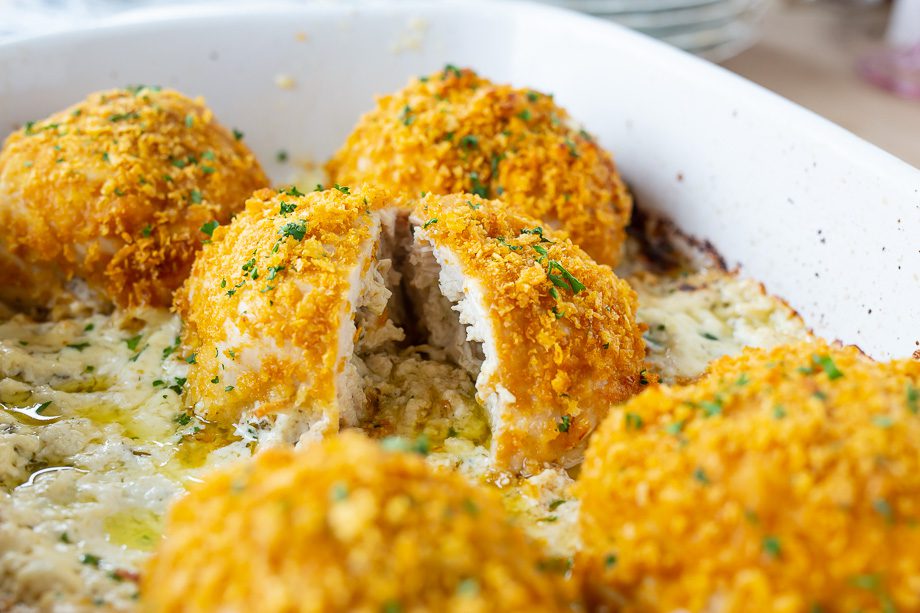
- Take the flattened chicken, and add a scoop of the cream cheese/butter mixture to the center of the chicken, and fold all the sides up around the filling. Use 2-4 toothpicks to pinch it together. It's okay if it's not perfect, just try to secure it so that all the filling doesn't leak out. I try to make mine in the shape of a ball.
- Once you've stuffed the chicken, dip each piece into the melted butter and then the cornflakes. Make sure to evenly coat each piece with both the butter and cornflakes.
- It's okay if they are not perfect in shape. If I use whole split breasts, they come out much larger but you can also use half breasts and the pieces will be smaller. I just use what I can find at the store. If you have smaller pieces of chicken then that's great for those people that want a smaller portion. They are quite large when you do a whole split breast.
- Add the chicken to the baking dish.
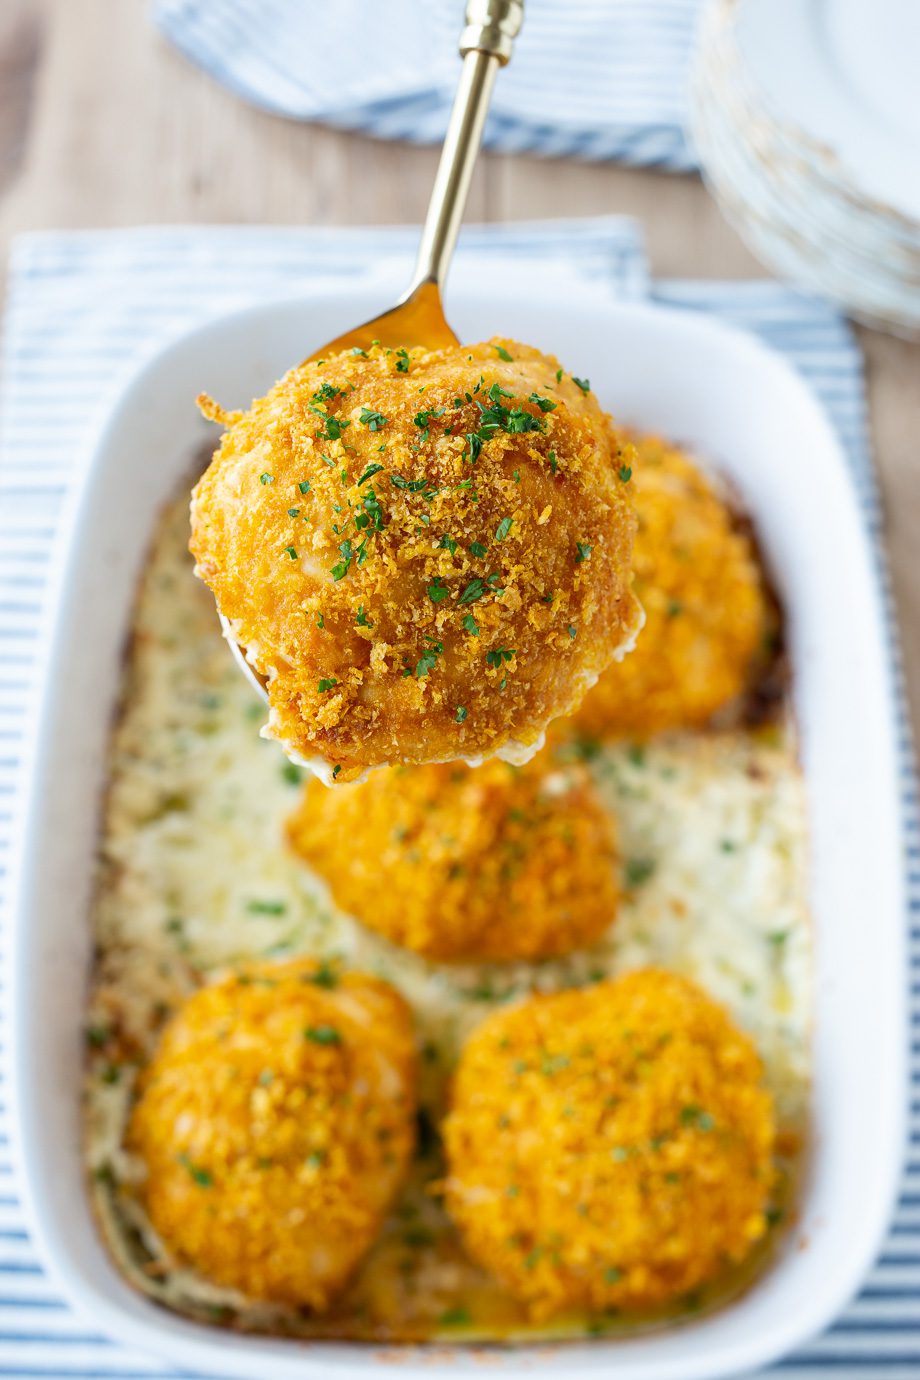
- Place uncovered in the oven set to 375° and bake for 45-55 minutes. Some of the filling will leak out of the chicken and that is normal. When you serve the chicken, make sure to scoop that overflowed filling out too! It's so good and you'll want to scrape the pan clean!
I hope you give this recipe a try! It’s perfect for any holiday season and everyone I’ve ever made it for loves it and asks for the recipe. If you want to make it keto or low carb, you can leave off the corn flakes and use something else that’s keto approved. It’s also gluten free. It’s great warmed up as leftover the next day too! My husband always asks me to make a little extra so he can have it for lunch the next day.
Thanks so much for stopping by! Send me an email in the comments if you have any questions and please feel free to subscribe to my blog so you never miss a post! I appreciate each and every one of you. You can follow me on Pinterest, Instagram and TikTok too!
xoxo,















Sounds delicious. However, not all corn flakes are gluten free — be sure to check the package!!
That is good to know! Thanks for sharing!
How timely. My sweetie asked for chicken Kiev last week! Im Going to use your recipe as it sounds delicious.
Oh how fun! Did you try making it? Would love to know how it turned out!
Looks yummy!
One of our family fav
One of our most requested for birthdays!
I make mine a bit different but oh so yummy!!
Thank you for sharing!
Thanks Linda!
Hi Holly,
What do you suggest as sides for the chicken kiev?
I usually just do some type of veggie, potato’s and carrots go well with it or asparagus! Sometimes I do rice too!
The recipe looks great. I can’t believe it was written April 12. How’d I miss it.
Hope to see another one just as wonderful real soon.
Thanks so much Judy! I shared another recipe last month too! I have more coming soon!
Good recipe.
Hope you are doing well Holly.
Your last post was April 12. Love your decorating.
Thanks Judi! I had to have three pretty major surgeries in May and so I’ve had to take some time off but I am getting back at it now that I am recovered. I shared a bout it on my Instagram if you want to know a little more! Thanks for following along!
Is there a typo in the recipe. I followed the recipe for the filling and used the TBSP of garlic salt it called for and it’s ruined. It is EXTREMELY salty. I have going to have to throw the whole thing away. No one can eat it!
I’m so sorry to hear that. I wonder if maybe it has to do with the different brands of garlic salt. I looked at the one I used and a couple other brands available and I think some have more salt to garlic ratio from what I can tell. I went ahead and updated the recipe to reflect that and will suggest using a smaller amount depending on the type of garlic seasoning salt. I am sorry it ruined your filling. I appreciate the feedback and thanks for letting me know. It really is a great recipe and loved by so many people that I’ve made it for. I hope you were able to still make it with less garlic salt that it worked out for you or that you’ll try it again!
Holly
i never use Garlic salt anymore because the do put way too much salt in it, I just salt by putting some in my hand and using my fingers to sprinkle just the right amount for me, same with just powdered garlic instead. we can always add more when you are eating it if you need more..
I think it all depends on the brand too! I have started making my own with salt, garlic, and parsely.